Description
Make a bold statement with our high-quality large format posters, ideal for conferences, scientific presentations, or businesses needing ample space to convey their message. Printed on 200 gsm high-quality satin material, these posters ensure vibrant, eye-catching displays.
Key Features:
- Sizes Available: Choose from A2, A1, or A0 to best suit your display needs.
-
Finishing Options:
- Boards: Enhance your poster's durability with Foamboard, Foamex, or Corriboard, with optional strut cards for freestanding displays.
- Gloss Lamination: Add a glossy finish for a sleek, professional look.
-
Additional Options:
- Eyelets: For easy hanging and display.
- Black Frames
- Poster Tubes
Perfect for any setting, our large format posters deliver high impact and professional quality. Let your message stand out with our expertly crafted posters.
Need prints fast? Get your posters in as little as 2 hours!
- Same/Next Day – Ready for collection or dispatch within 24 hours.
- 4-Hour Express – Fast-track service for urgent jobs.
- 2-Hour Priority – Ultra-fast printing for last-minute needs.
Size Guide
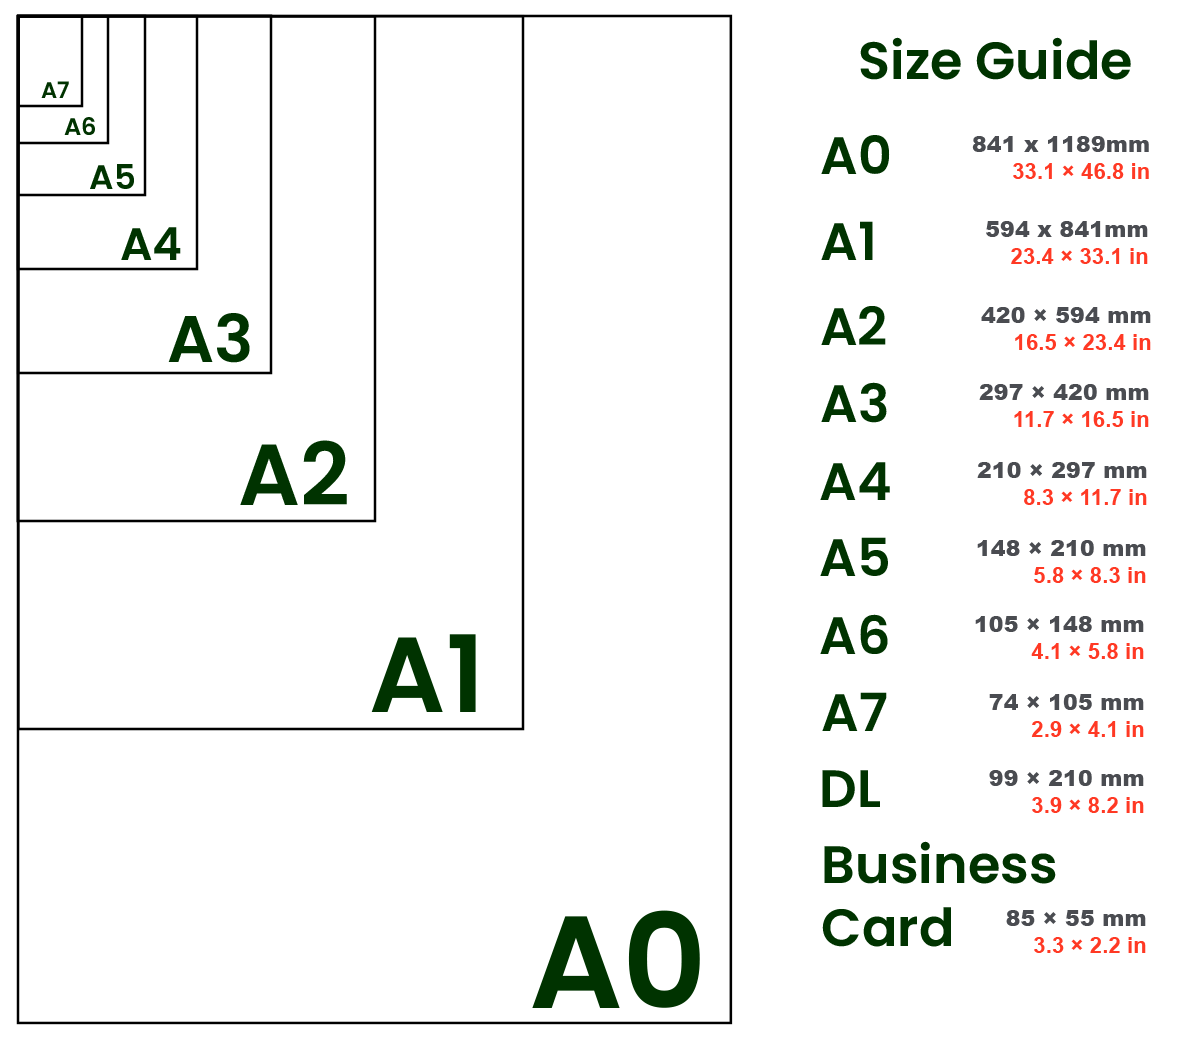
Size Guide
Paper Sizes and Measurements
| Paper Size | Millimeters | Inches |
| A0 | 841 × 1189 mm | 33.1 × 46.8 in |
| A1 | 594 × 841 mm | 23.4 × 33.1 in |
| A2 | 420 × 594 mm | 16.5 × 23.4 in |
| A3 | 297 × 420 mm | 11.7 × 16.5 in |
| A4 | 210 × 297 mm | 8.3 × 11.7 in |
| A5 | 148 × 210 mm | 5.8 × 8.3 in |
| A6 | 105 × 148 mm | 4.1 × 5.8 in |
| A7 | 74 × 105 mm | 2.9 × 4.1 in |
| Business Card | 85 × 55 mm | 3.3 × 2.2 in |
| DL | 99 × 210 mm | 3.9 × 8.2 in |
Envelope Sizes and Measurements
| Envelope Size | Millimeters | Inches |
| C3 | 324 × 458 mm | 12.8 × 18 in |
| C4 | 229 × 324 mm | 9 × 12.8 in |
| C5 | 162 × 229 mm | 6.4 × 9 in |
| C6 | 114 × 162 mm | 4.5 × 6.4 in |
| C7 | 81 × 114 mm | 3.2 × 4.5 in |
| DL | 110 × 220 mm | 4.3 × 8.7 in |

Print File Guidelines
Print File Guidelines
To ensure your designs are perfect for printing, understanding the concepts of Safe Area, Print Size Area, and Bleed Area is essential for creating "Print Ready Files." When uploading your files via our website for every order, the Safe Area guarantees that key content is visible, the Print Area outlines the actual size and cutting zone of your product, and the Bleed Area extends to the outermost cut line, allowing backgrounds to reach the edges of your product. This approach avoids white edges for a sleek, professional finish. Position important elements wisely and extend backgrounds as needed for the best printed outcome.
Please ensure your PDF files are locked/rasterized, all fonts are converted to outlines, and the colour mode is set to CMYK — failure to follow these guidelines may result in missing or incorrect images/logos, colour mismatches, font issues or missing text; reprints due to such errors will incur a full-price re-charge
Please ensure your PDF files are locked/rasterized, all fonts are converted to outlines, and the colour mode is set to CMYK — failure to follow these guidelines may result in missing or incorrect images/logos, colour mismatches, font issues or missing text; reprints due to such errors will incur a full-price re-charge
What is the Safe Area?
All content within the Safe Area is guaranteed to appear on your printed product. Content outside this area may be cut off during the trimming process. For best results, keep text and important elements of your photos, logos, and designs within the Safe Area. We recommend 5mm of safe area from each edge of the Print Area for Logos/Borders/Text.
What is the Print Size Area?
The Print Size Area is the space between the Safe Area and the product edges. This area defines the actual size of your product and where it will be cut after printing. For optimal outcomes, ensure that all important content is not located in this area and that the background colors/artwork extend beyond this area.
What is the Bleed Area?
The Bleed Area marks the outermost point to which your product could be cut. Background colors or images that extend completely to this line are referred to as full bleed. Full bleed ensures that your background will print to the very edge of your product. We recommend a minimum of 3 mm bleed on the sides and top/bottom of your files. White edges occur when the background does not extend to the bleed line.
Why is it necessary to outline a font?
Outlining fonts for printing ensures consistency, avoids licensing issues, enhances file compatibility, and can reduce file size. It converts text into graphics, ensuring the design appears as intended across all systems and printers, maintaining design integrity and quality in printed materials. This step is crucial for achieving professional-quality prints and customer satisfaction.
Safe Area
-5mm each side
-5mm each side

Print Size
Area
Area

Bleed Area
+3mm each side
+3mm each side

Print File Guidelines